Easily Add Your Signature to a PDF With Foxit Reader (Free)
 Let's say you need to sign a document and send it back to the person requesting it via email. You could always print it out, sign, then scan to a PDF. But that is time-consuming, wastes paper, and the original PDF file ends up looking degraded from the trip through the printer & re-scanning.
Let me show you the easiest way I've found: using the free program Foxit PDF Reader.
I recommend downloading it from ninite.com, as that's the easiest way to install it, but you can download it from their official site as well. Just make sure to get the FREE version; you don't need anything more advanced than that.
As of the time of this writing, I am using version 12, though these instructions should work similarly for other versions.
Step One: Sign your name on a white sheet of paper and scan it.
Crop it, and save as jpg or png. Make sure to sign it nice and big, so if you need to resize it later you can.
Important Note: I am going to show you how to simply add your graphical signature to a file. If you need a proper "e-signature" which can be validated, perform the same steps, but use the "Foxit eSign" tab instead of the "Protect" tab.
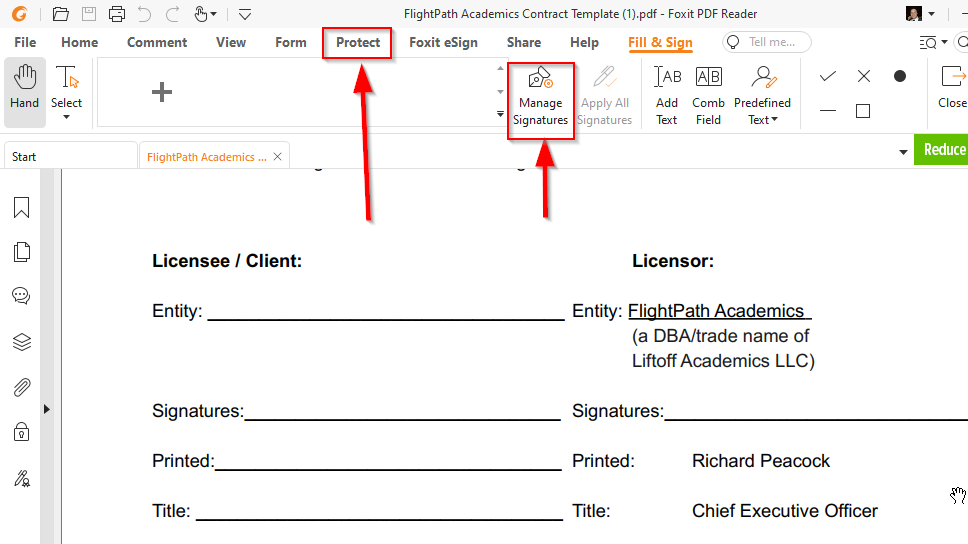
Step Two: Open Foxit Reader and click on the "Protect" tab at the top. Then click the "Fill & Sign" button. This will automatically move you to a new tab called "Fill & Sign". Click the "Manage Signatures" button as seen here:
In the window that opens, click "Create" or "Add", then select the "Import" tab at the top, like so:
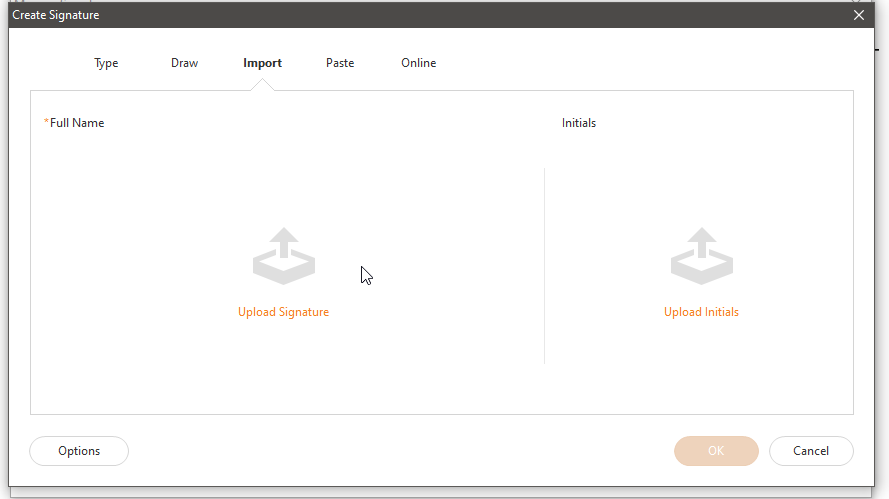
Click "Upload Signature" and select the image file you created in step one. Click "OK" and close out until you get back to the main screen.
Step Three: Sign a document!
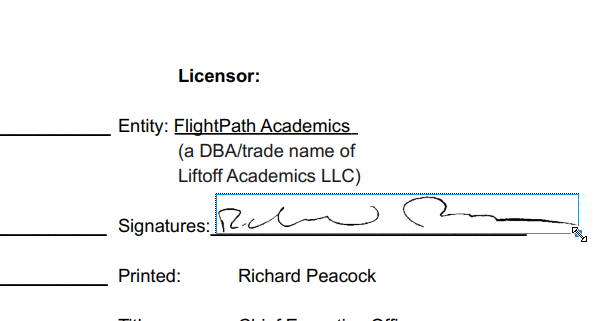
Open a PDF. On the Protect -> Fill & Sign tab, you now should see your signature in a box near the top left. You can click it to "select" the signature, then click on the page where you want it to go.
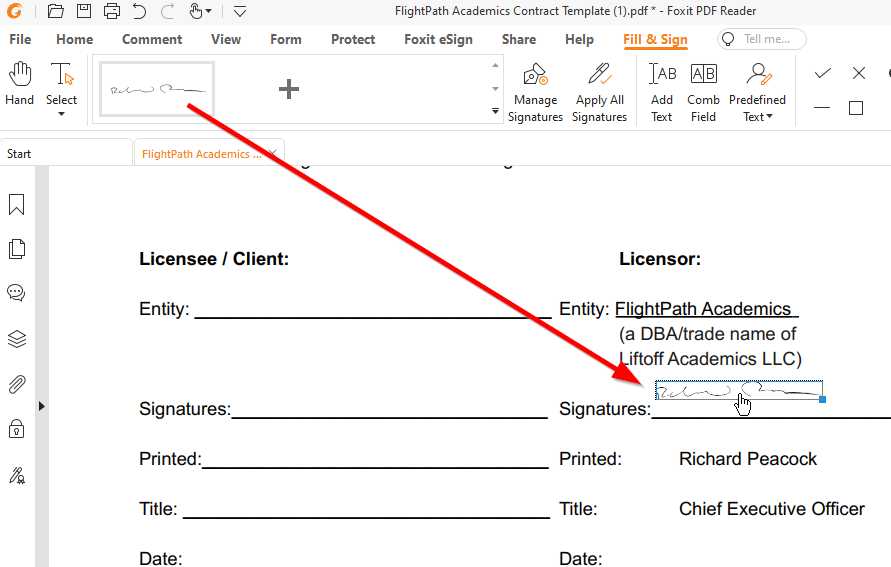
Finally, now you can use the corner handle to drag the signature to make it bigger.
Step Four: Make sure you save!
Note: If you decided to use the "Foxit eSign" method, It will ask you to "log in". I chose to just use my Gmail account for simplicity. It may also ask you to download certificates used for the purpose of validating the signature. I recommend proceeding with that. Afterwards, your signature will have an ID code under it, which is clickable for more information about when the document was signed. But if all you need is a signature as shown above, you needn't go that route.
Bonus Tip!
From the Home tab, use the "Typewriter" button to add text anywhere in the PDF. Very handy for adding dates, titles, etc.
Happy signing!