Make Chrome Auto-Accept Your Self-Signed Certificate
 As developers, sometimes it's necessary to create self-signed certificates on our servers, but it sure is annoying every time you visit the page and you have to click through Chrome's privacy warning screen.
Luckily, there is a simple way to let your copy of Chrome always trust your own SSL cert.
Please note: you'll want to view our previous blog post, on how to create a Self-Signed "SAN" Certificate, which is required for Chrome to auto-accept it.
As said above, make sure your self-signed certificate is configured using "SAN" or "Subject Alternative Names." A few versions ago, Chrome decided that it would only be able to trust self-signed certs set up this way. For reference, at the time of this writing, I am using Chrome 77.
Step One
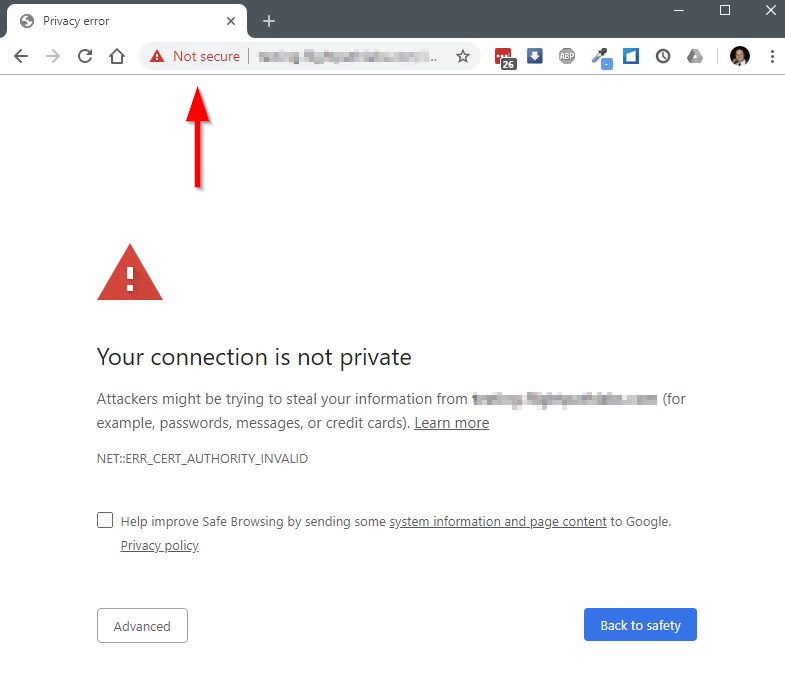
Visit your site, and see the normal self-signed certificate warning. Click the "not secure" warning icon in the top address bar:
Step Two
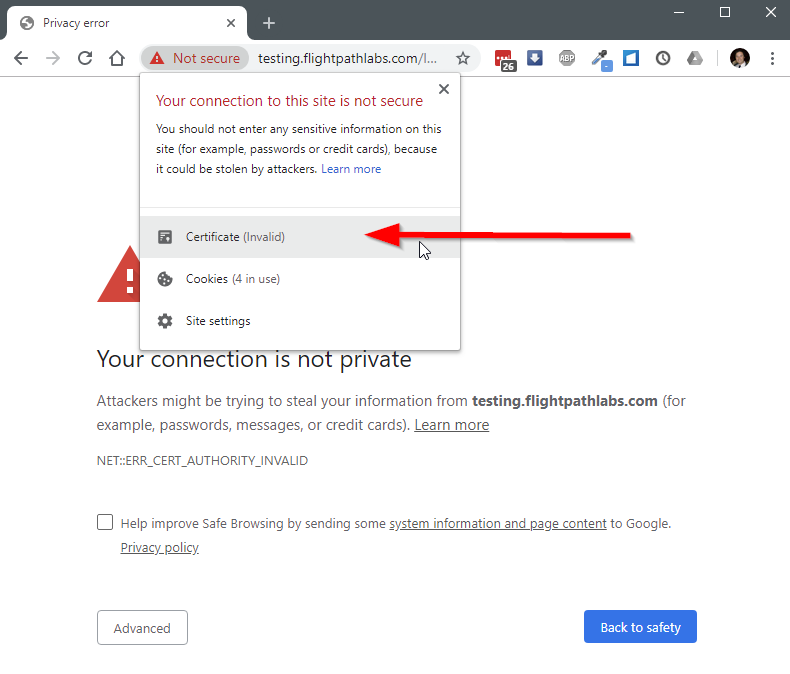
Select the "Certificate" link from the little box that pops up:
Step Three
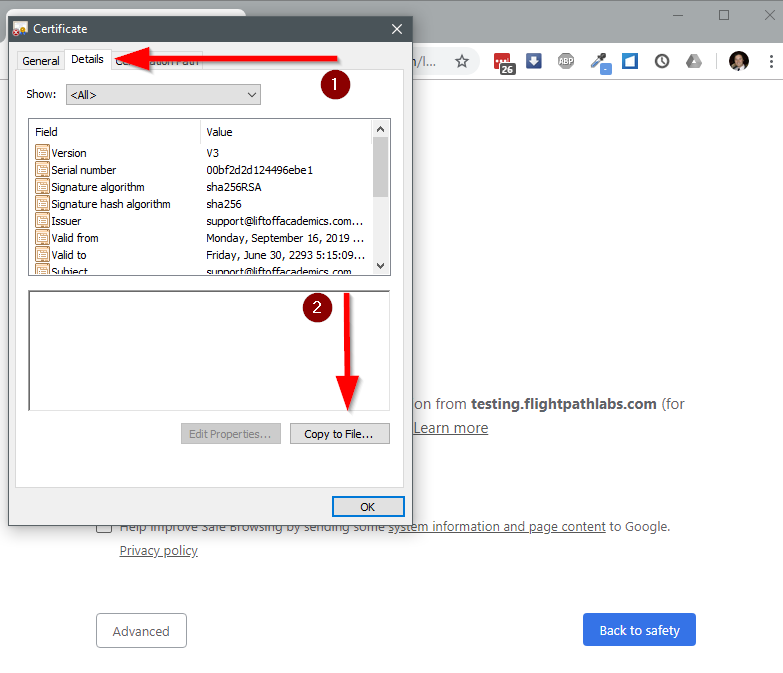
In the window that opens, go to the Details tab, then click the Copy to File button. This might also appear as "Save to File" or something similar:
Step Four
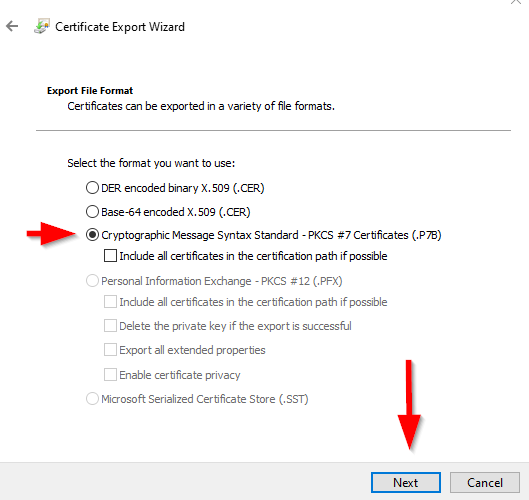
Select that you wish to export as a PKCS #7 Certificate, as shown in the following image. Select a filename and save.
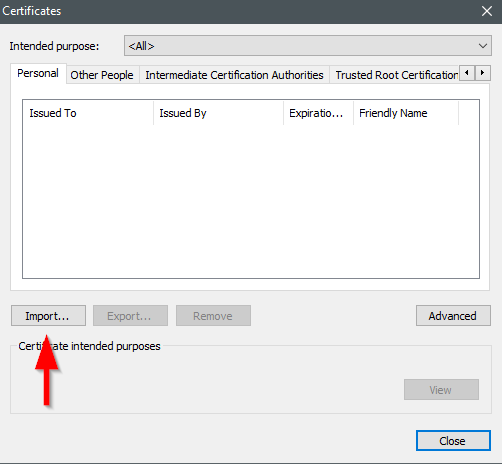
Step Five (Importing the Certificate into Chrome's Settings)
Go to your Settings in Chrome. Usually, this is done by clicking the 3 dots in the upper-right of the window, and select Settings. Scroll all the way down, click to view "Advanced", then select the Manage HTTPS/SSL Certificates link. You will see a window open like this: Click the Import button.
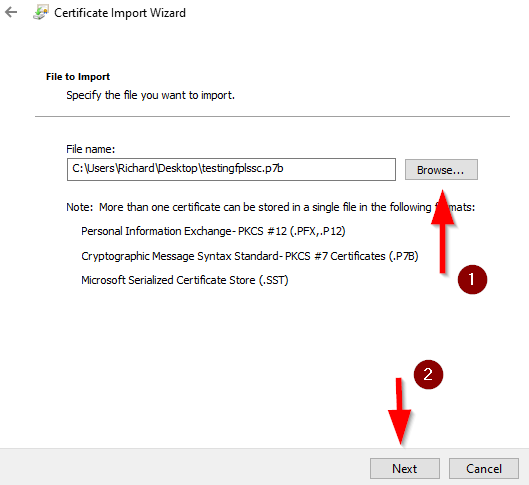
Step Six
Browse for the file you just saved. You will probably need to select "All Files" as your filter, to make it show up. After that, click the "Next" button.
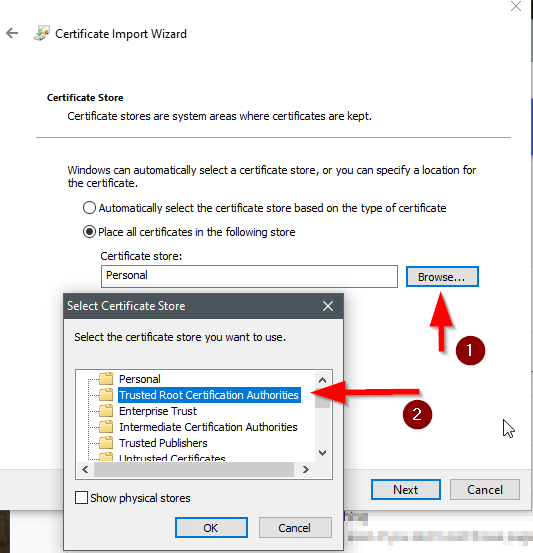
Step Seven
On the next screen, click Browse where it asks you where to place the certificate. Select "Trusted Root Certification Authorities", Then click OK & Next. You will receive a security warning, just click Yes, you do indeed want to install the certificate. After all, it's your own self-signed cert!
Step Eight (Final Step!)
Okay, you're finally done! Completely close out Chrome and all of its windows, then start it back up again and visit your site. You should be able to visit your site with no warnings at all.
Now, it goes without saying that this only works on your own computer. But taking this quick 5-minutes will save you a world of time later on.